This section describes how to set up a typical sign-up/sign-in flow for your app. If you need your app to have functionality not described here, contact your Implementation Manager.
What your authentication flow needs to do
1. Create a user account. This includes the creation of a KWS user ID which is linked to the user account in your user accounts management system.
2. Log the user in to your app. This involves:
- authenticating the user
- activating the user in the app
- authorising the user
3. Trigger a permission review/request.
4. Enable the user to delete their account.
UI guidelines
Follow these UI guidelines to ensure that the screens you build remain compliant while achieving the best UX for your users:

1. Create a user account
First, your SSO view needs to be able to create an account for each new user. Follow these steps to create a user account:
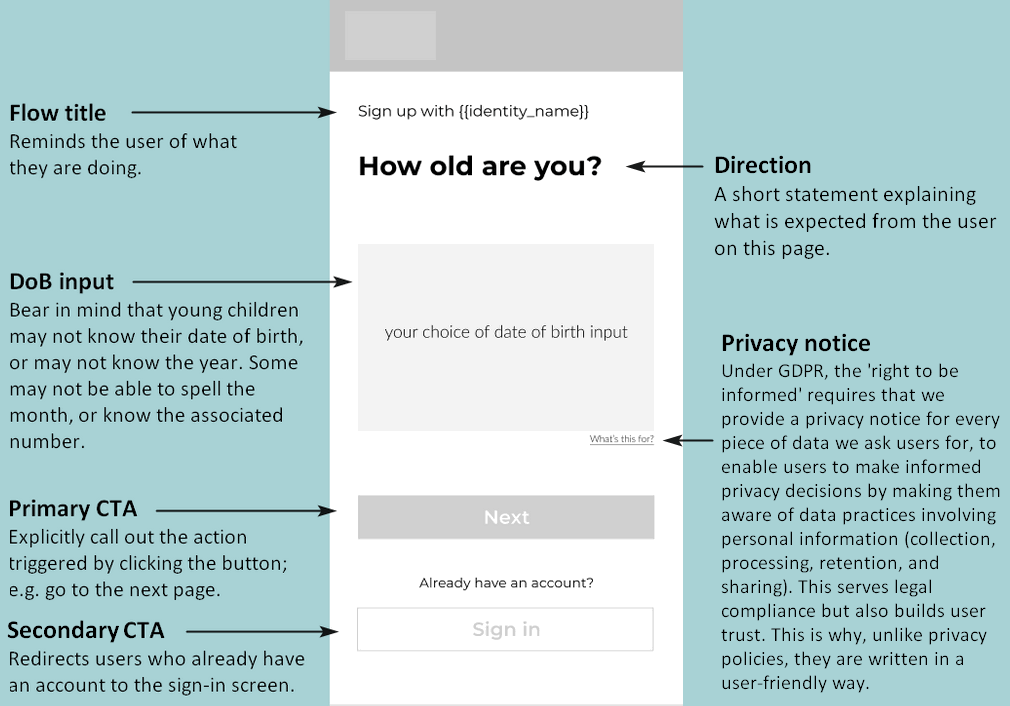
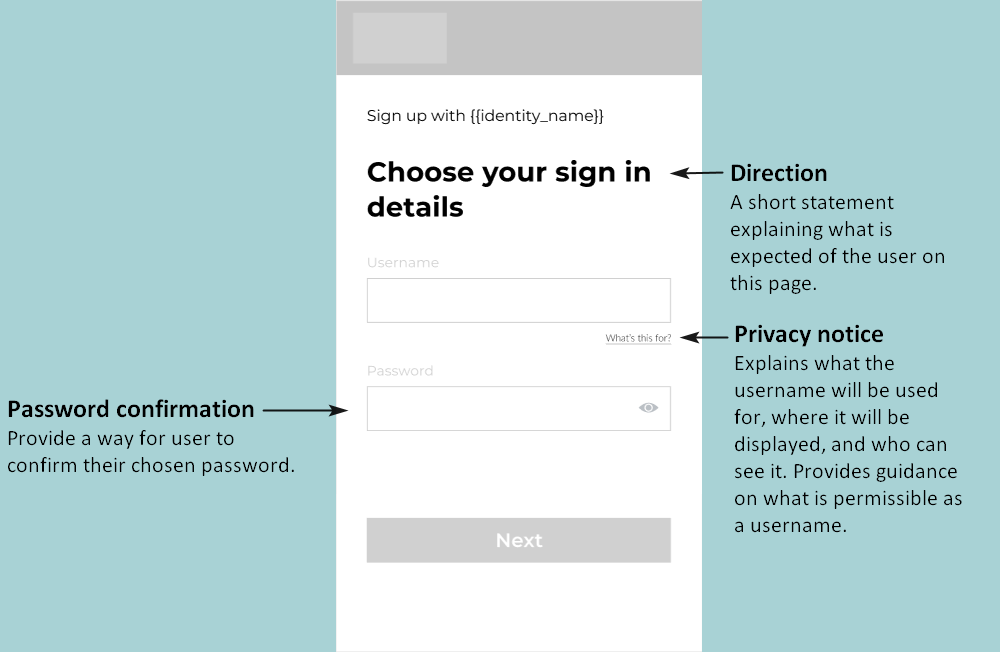
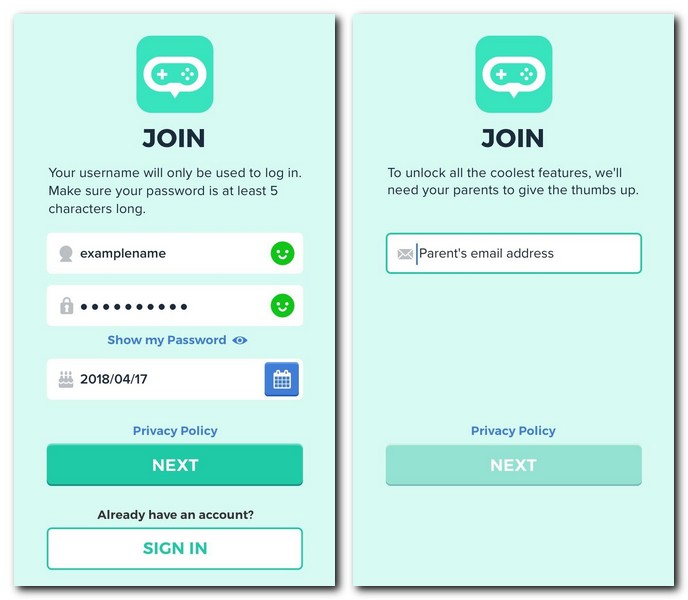
1.1 Capture the user’s sign-up details
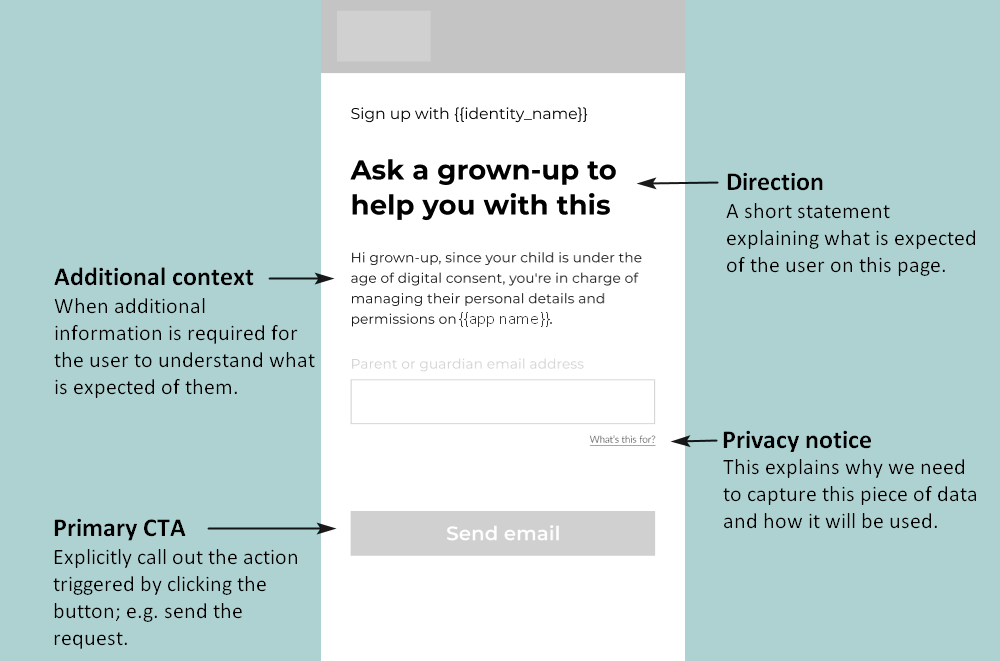
To register a user (create an account), you need a form that enables the user to enter a username and password. Depending on the configuration of your app, they may also need to enter their date of birth and (if they are below the age of digital consent) a parent’s email address.

1.2 Check if the user is below age of digital consent
Send a request with the user’s DoB, and optionally their country, to the child-age endpoint. The endpoint returns an isMinor Boolean that indicates if the user is under the age of digital consent.
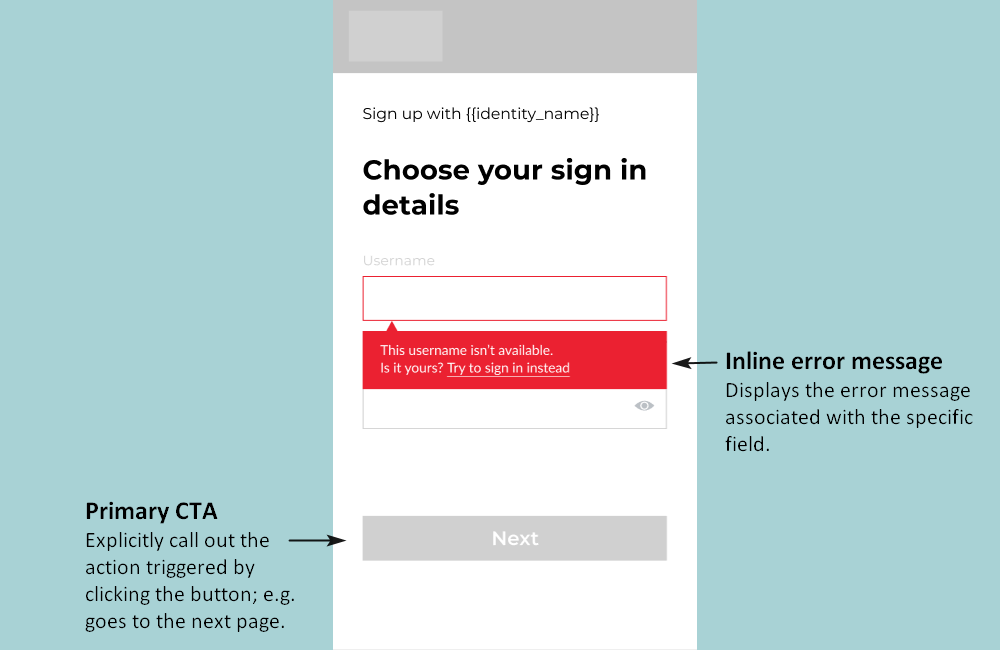
1.3 Check that the provided username is unique
Call the check-username endpoint to ensure that the entered username is unique and passes moderation.
1.4 Send the data to the user creation endpoint
Submit the form data to the user creation endpoint, which creates a KWS user ID, linked to the user record in your user accounts management system.
2. Log the user in to your app
Now that the user has been registered successfully with an account, your SSO view needs to log the user in and activate them in the app before an authorisation code can be retrieved and sent back to the app. This functionality is required when:
- A user gets logged out and needs to log in again.
- You have multiple apps using the same SSO and the user is logging into a ‘new’ app for the first time.
Authentication follows the OAuth framework, with the added complexity of having multiple apps: the user may be activated on one app but not on the app they’re trying to sign in to.
The log-in flow can be summarised as follows:
| Step | Description |
|---|---|
| Authenticate / get access token | Get an access token with SSO scope by POSTing to /oauth/token. |
| Try to authorise | POST to /oauth/authorise using that access token. – If unsuccessful (response 403), you need to activate on the app by POSTing to /v1/users/:userId/apps. – If successful, use the code returned from /oauth/authorise to get an access token using OAuth authorisation code grant, or authenticate the user using Password grant. – Any other response means authentication failed (for example, user not found). |
The following sections describe authentication, authorisation, activation and refreshing the token in more detail:
2.1 Authenticate the user / Get an access token
To log a user in, first the OAuth Password Grant must be used to get an OAuth authentication token (“access token”) with SSO scope. To do this, POST to the /oauth/token endpoint.
If you know the user has already been activated on the app they’re trying to access, you can simply POST to /oauth/token using the app’s client ID and API key to form the Basic authorization header:Authorization: Basic base64(‘<appID>:<apiKey>’)
This retrieves a token directly using the OAuth Password Grant.
When the user is successfully authenticated, the response returns an access token in the form of a JSON Web Token (JWT) which has the scopes ‘sso’ and ‘user’.
Example:
curl -X POST \
  https://{API_URL}/oauth/token \
  -H 'Content-Type: application/x-www-form-urlencoded' \
  -H 'Accept-Language: en' \
  -H 'Authorization: Basic c3VwZXJhd2Vzb21lY2x1YjpzdXBlcmF3ZXNvbWVjbHVi' \
  -H 'Accept: application/json, text/plain, */*' \
  -d 'grant_type=password&username=<username>&password=<password>'
Storing the access token
This token should not be exposed outside of the SSO. However, you can store it and use it to retrieve an auth code, which can be returned to the application and used to get a token with the correct scope.
It is recommended that you store the token as a cookie so it can be used later by the user if they return to the app and wish to log in again, or if they wish to manage their account.
2.2 Authorise the user
Now that you have the access token, you can authorise the user, using the /oauth/authorise endpoint.
- If successful, this endpoint returns an auth code that can be exchanged for a token for the signed-in user, as per the OAuth 2.0 authorisation framework. On getting a successful response, redirect the user to the ‘redirect URI’ passed to this request.
- If you get a ‘403’ error response from this request, it means the user is not yet activated in the application. Make a request to the activation endpoint (as described in Activate the user on the app below) and then attempt the login request again.
Example:
curl -X POST \
https://{API_URL}/oauth/authorise \
-H 'Content-Type: application/x-www-form-urlencoded' \
-H 'Accept-Language: en' \
-H 'Accept: application/json, text/plain, */*' \
-H 'Authorization: Bearer <token>' \
-d 'response_type=code&client_id=<appClientId>&redirect_uri=<appRedirectUri>'
2.3 Activate the user on the app
If this is the first time the user is logging in to the app, you need to activate the user for that app, by POSTing to the /v1/users/:userId/apps endpoint.
Whether the user has just created an account or is logging in to a new app using an existing account, they must be activated in the app before they can be authorised and provided with a token scoped to the app.
2.4 Refresh the token
A refresh token allows your app to obtain a new access token without prompting the user.
You can refresh an access token, as described in the OAuth spec.
To do so, POST to /oauth/token as in Authenticate the user / Get an access token, but instead of passing the user’s credentials, use:
- grant_type: ‘refresh_token’
- refresh_token: the refresh token you saved from authentication
The response contains:
- a new access token
- a new refresh token which replaces the one you had stored
Refresh tokens expire every 14 days by default.
3. Trigger a permission request/review
Your authentication flow needs to include the capability to monitor the user’s permissions status, and to prompt the parent via email to grant or review their child’s permissions. To implement this, use the following endpoints:
Check a user’s permissions status
To check if a user has been granted a permission, use the permissions endpoint. The response has a permissions object that lists each permission and a Boolean value that indicates if the permission has been granted, denied, or is still pending.
Request permissions from parent
To ask the parent to grant specific permissions, use the request-permissions endpoint.
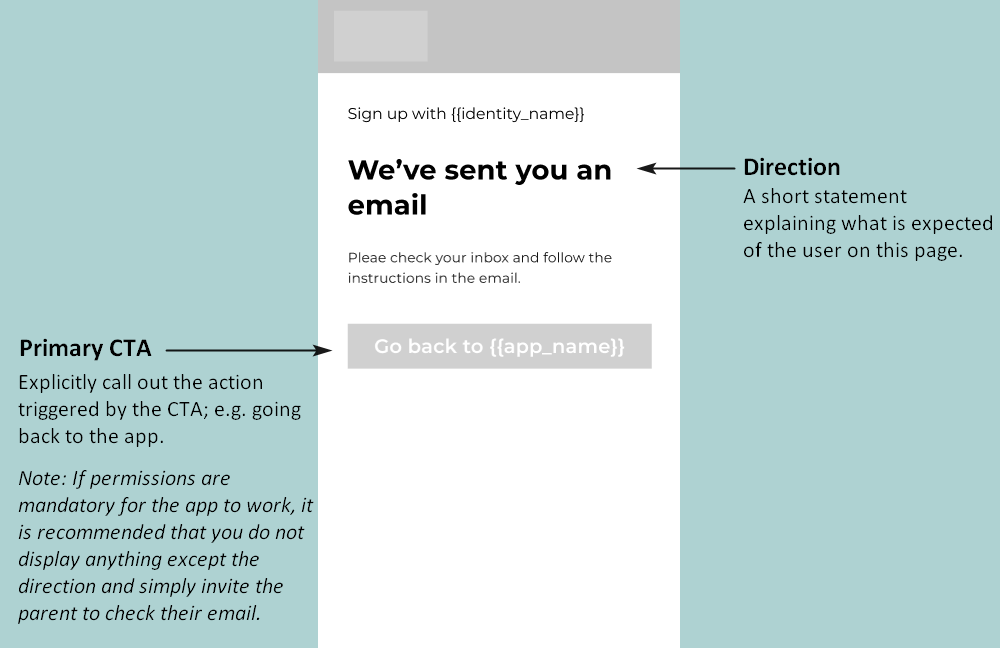
This endpoint is called from your app. When a child performs an action in your app that needs a specific permission, you can call this endpoint to send a request to the child’s parent. The endpoint triggers a permission request email to the child’s parent. The email informs the parent of the request and explains how to grant or revoke the permission.
Ask parent to review their child’s permissions
To ask a parent to review their child’s permissions, use the review-permissions endpoint. This endpoint sends an email to the parent with an authenticated link to the Parent Portal. When the parent clicks on the link, they are automatically logged into the Parent Portal where they can review their child’s permissions.
4. Enable the user to delete their account
To comply with GDPR, your SSO view must allow a user to delete their account.
To delete the user’s account on their behalf, call the delete-account endpoint, specifying the user’s ID in the URL and their password in the request body.